|
|
|
|
Resetting using Init |
|
THIS MUST BE DONE BEFORE INSTALLATION OF THE CHIP. Step 1: Find The Serial Number of Your Box You will find the serial number on the base of your box. Write down the first 10 letters/numbers. Alternatively, press F2 on your keypad or remote control and you will see 10 pairs of numbers followed by 2 flashing pairs of numbers. Ignore the flashing pairs and write down the right hand digit of each pair: e.g. 01 02 45 67 87 23 10 99 65 23 becomes 1257730953 Step 2: Open Your Cable Box And Prepare The Connections DISCONNECT YOUR BOX FROM THE POWER SUPPLY AND PLACE IT ON A GOOD WORKING SURFACE WITHIN EASY REACH OF YOUR COMPUTER. Opening your box can be difficult due to the security screws used to fit the cover. Ideally the appropriate security tool should be used (either a Jerrold screwdriver which can be supplied by us or a Whitehead #3 bit). However, the can be opened using long nosed pliers or wire strippers - and a lot of patience. You will also have to cut the black plastic anti-tamper plug at the rear of the box, using a Stanley knife BE CAREFUL. Now you need to locate the ground and data lines inside your box using the appropriate diagram. If you do not have a diagram that matches, please contact me for one before proceeding. Carefully cut the data line using a small sharp wire snips. Look closely to see that the 2 halves of the data line are separated. Try not to disturb it too much. Get 2 lengths of wire (plastic coated) and strip the ends and "tin" them - this is the process of coating the ends with solder. "Tin" the points to be soldered and then solder one wire to the ground point in the box, and the other to the microprocessor side of the data link. As you look at your diagram, this will be the left hand side if your data line runs east to west, and the bottom end if it runs north to south. Closely inspect your work to make sure that the solder joint is sound. NOTE: Prior to soldering, ensure that your soldering iron is fully heated up, and try to minimise the amount of contact it has with the links, as excessive heat can melt solder on the underside of the circuit board. Step 3: Connect The Leads To Your Computer Place your cable box so that it is within easy reach of the computer and a power socket. Step 4: Powering Up Your Cable Box You can now switch on your cable box and switch it to a channel other than channel 2. Please note that the cable box must be switched on and connected to the computer BEFORE running the INIT program. SAFETY: It is very dangerous to place your hand inside the cable box whilst it is powered up. Take every care to avoid contact Step 5: Running INIT INIT.com must be run in DOS mode on your computer. This can be done by Pressing the F8 key on your computer keyboard when you see the words "Starting Windows …..", and selecting the "Command Prompt Only" option from the menu.. Alternatively, you can select the "Shut Down" menu on the Start Button Menu and click "Restart in MS-DOS Mode". This program will NOT run correctly in a DOS Window or under Windows NT. You are now ready to run INIT. In DOS mode, this is done by typing in the path and name of the program (INIT) and hitting the ENTER key. If you can't locate the INIT program, use the DOS command DIR tcinit.* This will list INIT if it is present in the current folder If you run into difficulty in DOS mode, re-enter Windows and copy the INIT program to the root directory (C:), and then re-enter DOS mode. Once you have entered the program, you will be prompted to enter the serial number of the box. You can enter this in alpha numeric form (capital letters and numbers) from the bottom of your box, or in numeric form (obtained by pressing F2 on your cable box). When you hit the ENTER key the process of loading the address is done nearly instantaneously. If the operation is successful, the channel number on your box will change to channel 2, and you are now ready to fit the chip. |

|
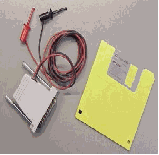
INIT KITS AVAILABLE £20 PLUS £3.75 P&P |


|
INIT SOFTWARE FREE WITH ALL ORDERS |